Creating Backups
This guide walks through the backup process in a more practical, real-world way.
It explains:
- when to use each backup type,
- what the available options mean,
- how size estimates are shown,
- and what happens while a backup is being created.
If this is your first time using the feature, read Choosing the right backup type and Before you click Create Backup before doing anything else.
Open the backup dialog
- Go to System > Backups.
- Click Create Backup.
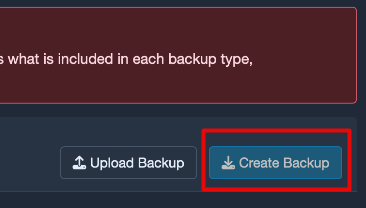
Screenshot: Create Backup button in the panel header.
The create dialog opens with the backup type selector and the options relevant to the type you choose.
Choosing the right backup type
The most important decision is not the button click. It is choosing the backup type that matches your recovery goal.
Use Config backup when your goal is to preserve how Allsky is set up.
Typical situations:
- before changing camera settings,
- before editing module pipeline files,
- before reworking overlays,
- before updates or migrations,
- before troubleshooting experiments.
If a future restore needs to bring back configuration, this is the backup type you want.
Use Images backup when your goal is to preserve captured image data.
Typical situations:
- before cleanup or retention jobs,
- before moving image storage,
- before rebuilding or replacing a system,
- before archiving or sharing specific nights.
If a future restore needs to bring back images, this is the correct choice.
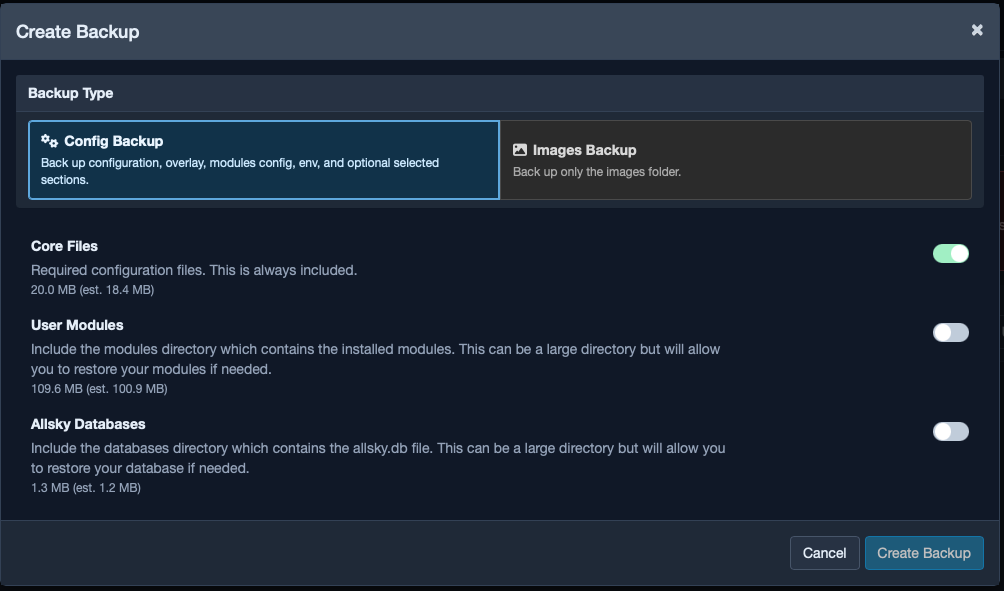
Screenshot: Backup type selector in the create dialog.
Simple decision guide
Ask yourself one question: do you want to restore settings later, or images later? That answer tells you which backup type to create.
Config backup in detail
Config backups are built in two parts:
- Core Files
- Optional Sections
This makes it possible to always capture the essential configuration while still letting you include heavier or more situational data when needed.
Core Files
Core files are always included and cannot be disabled.
These are the files Allsky needs in order to restore the main configuration state, including important areas such as:
- camera-aware settings and
ccfiles, - overlays,
- module configuration,
- and environment or configuration files used for operation.
If your main goal is "I want to be able to get my setup back," the core files are the foundation of that recovery.
Optional Sections
Optional sections let you include additional data when a basic configuration snapshot is not enough.
Common examples include:
- User Modules
- Allsky Databases
For each optional section, the dialog shows:
- a short description,
- the estimated raw size,
- and the estimated compressed size.

Screenshot: Optional section switches with size/estimate details.
How to decide what to include
If you are preparing for a full migration or a serious recovery scenario, include the optional sections you may need. If you only want a fast rollback point before changing settings, a smaller config-only backup is often enough.
Service pause behaviour for database consistency
If you include database-related data, Allsky may stop the allsky service while the archive is being created.
This is done to avoid backing up files that are actively changing at the same time they are being read. Once the archive has been created, the service is started again.
This behaviour is normal, and it exists to prevent inconsistent database backups.
Note
A brief service stop during backup is expected when database-related content is selected.
Images backup in detail
Images backups are focused on captured data rather than configuration.
You can create them in two ways:
- All folders,
- or Selected folders only.
The folder list is built from the image date folders available on your system.
Size and estimate summary
Images backups can become large quickly, so the dialog shows estimates to help you make sensible choices before starting.
You may see:
- total selected raw size,
- estimated compressed size,
- and per-folder values when individual folders are selected.
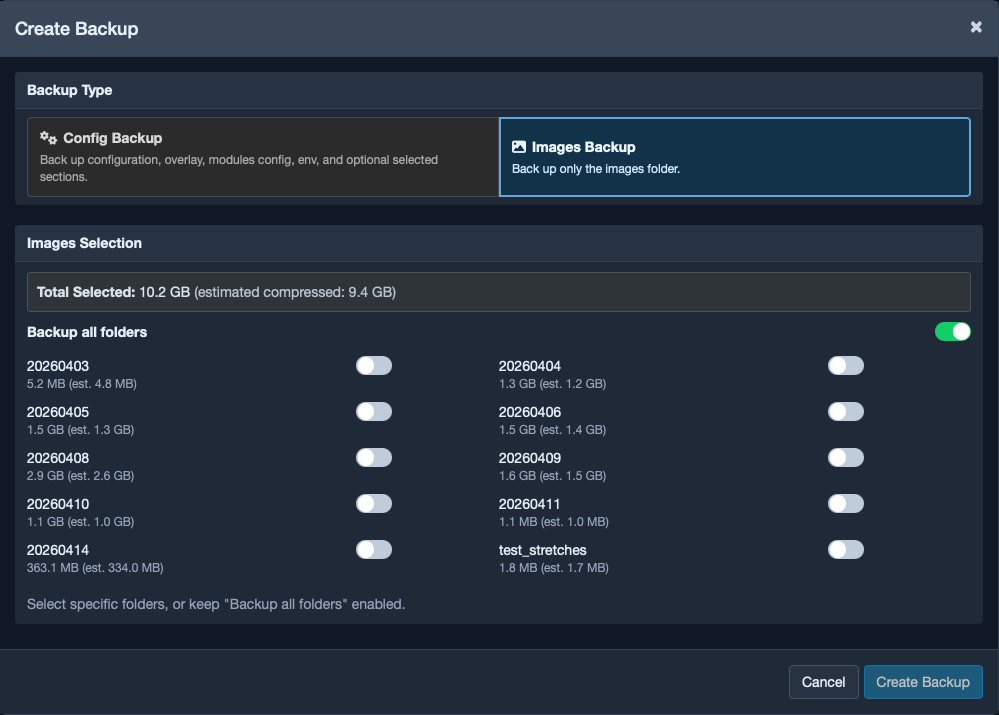
Screenshot: Images folder selection with per-folder size details.
How folder selection behaves
The selector is designed to make your intent clearer and reduce mistakes:
- All folders is enabled by default.
- If you choose one or more specific folders, the dialog switches to an explicit folder selection.
- If you switch back to All folders, the backup will again target the full image set.
This matters because image backups can take time and can use significant storage space. It is worth confirming that the selected dates match what you actually want to keep.
Before you click Create Backup
Run through this checklist:
- You selected the correct backup type.
- The optional sections match your real recovery goal.
- The folder selection, if applicable, matches the dates you want.
- The estimated size is reasonable for your storage and transfer limits.
- You understand the backup may take a while, especially for large image sets.
Avoid the common mismatch
A config backup does not protect your image history, and an images backup does not protect your system configuration. If you need both, create both.
What happens during backup creation
When you click Create Backup, the create dialog closes and a progress modal appears.
The modal shows:
- the current stage,
- percentage progress,
- status text,
- and any warnings or errors that appear during the process.
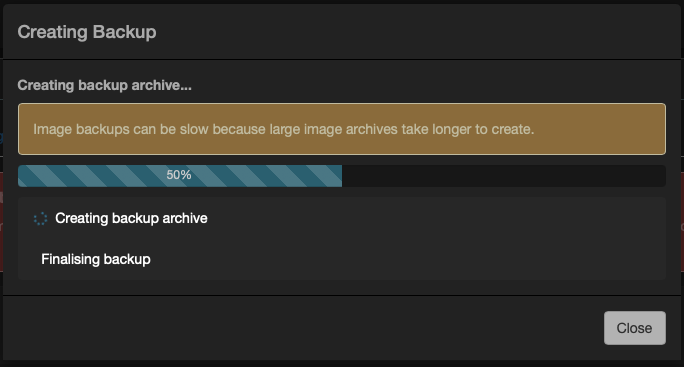
Screenshot: Backup progress modal with stage list and progress bar.
Image backup timing
Large image backups can take a while. The actual runtime depends on the amount of data, storage speed, and the system load while compression is running.
After the backup finishes
When the backup completes successfully:
- the progress modal finishes,
- the backups table refreshes,
- and the new backup appears in the correct group.
A good next step is to click Info on the new backup and confirm that it contains what you expected.
That quick check is worth doing immediately, while the backup is still fresh in your mind.
Uploading an existing backup archive
If you already have a backup file from somewhere else:
- Click Upload Backup.
- Select the
.tar.gzarchive. - Wait while Allsky validates it.
The system checks the archive structure and its metadata before accepting it into backup storage.
Operational best practices
Recommended baseline
- Keep at least one recent config backup and one older known-good config backup.
- Keep image backups for important nights before cleanup.
- Download critical backups off the device.
- Create backups before maintenance, upgrades, or experiments.
Common mistakes to avoid
- Creating only image backups and assuming configuration can be recovered later.
- Forgetting optional sections before a migration or rebuild.
- Not checking the contents of a newly created backup.
- Keeping every backup on the same SD card or device and nowhere else.