Images
The Images area of the WebUI is where you browse the files Allsky has saved and review the results of a capture session in a practical way. Although the page title is Images, this part of the WebUI is really a general viewing area for the output Allsky creates. It gives you one place where you can move between the original saved frames and the processed products that were generated from them.
For most users, this becomes the normal starting point when checking how a night went. If you want to review cloud conditions, confirm that the system captured a particular event, compare one night with another, or simply enjoy the results, this is the area you will probably use most often.
From here you can:
- open the saved images for a specific day
- play that day’s timelapse video
- view the keogram and startrails images
- remove a day’s files if you no longer want to keep them
Allsky organises this part of the WebUI by date, so the normal workflow is simple. You begin by choosing a day, then open whichever output you want to inspect more closely. That date-based layout keeps related files together and makes it easy to move between different views of the same capture period.
The first screen is the day list. Each row represents one saved date and gives you a quick summary of what is available for that day. At a glance, you can see whether there are saved images, a timelapse, a keogram, or startrails. This makes it much easier to find a specific night or check whether a particular output was created, because you do not need to open several pages just to see what exists.
This view is especially useful if you are browsing a large archive. Instead of remembering file names or searching through directories manually, you can scan the list by date and immediately open the night you want. If you are trying to confirm whether Allsky captured something interesting on a certain evening, this is usually the best place to start.
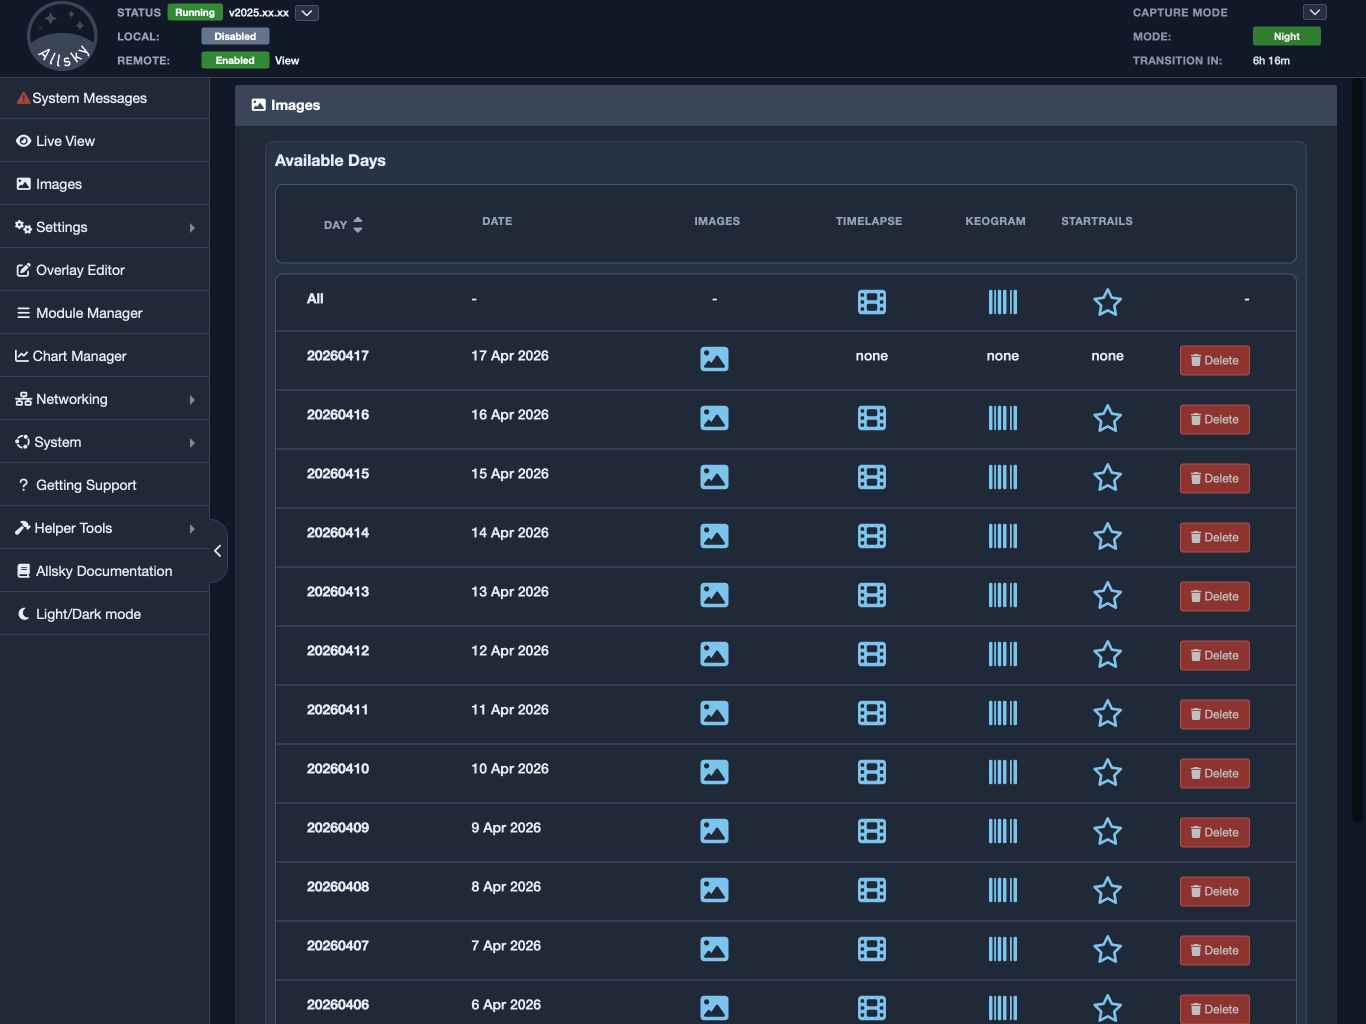
Day listing page
The All row at the top is useful when you want to browse one type of output across many dates instead of focusing on a single day. For example, you can jump directly to all timelapses, all keograms, or all startrails without opening each date one at a time. That is convenient when you want to compare several nights, look for trends over a period of time, or quickly browse only one kind of result.
This can be particularly helpful if you are checking for changes in sky quality, comparing weather across multiple nights, or reviewing how well the system has been performing recently. There is no equivalent option for all saved images because the number of individual frames can be very large, and showing them all in one page would usually be slow and difficult to work with.
When you open a day’s saved images, you are looking at the individual frames Allsky kept for that date. This is the most detailed view in the Images area and is the best choice when you want to examine a particular moment closely. While a timelapse is useful for understanding the overall flow of the night, the saved-image view is the better choice when you need to inspect a single frame carefully.
For example, this is where you might go to check whether focus was good, see when cloud started to move in, confirm the exact time of an aircraft or meteor, or look at how the sky appeared during a specific part of the night. If something in a timelapse catches your attention, the saved images are usually the next place to go.
The image order can be changed in the WebUI settings, so you can view them oldest-first or newest-first. That gives you some flexibility in how you review a night. Some users prefer to start at the beginning and move forward in time, while others prefer to start with the latest images and work backward.

Placeholder: saved images for a single day
Timelapse videos are usually the fastest and most natural way to review a full night or day. Instead of stepping through individual images one by one, you can watch the sky change as a continuous sequence. This gives you a quick understanding of what happened over time and makes it much easier to recognise motion, transitions, and longer patterns.
For many users, the timelapse is the first thing to open when checking a date. It is often the easiest way to spot moving cloud, changing sky brightness, sunrise or sunset transitions, passing weather, and anything unusual that happened across the capture period. If you only have a few moments to review a night, the timelapse is usually the most efficient place to begin.
Keograms and startrails give you two additional ways to review the same night, each with a different purpose. A keogram compresses the changing sky into a single time-based image, which makes gradual changes easier to recognise at a glance. It is useful for spotting shifts in brightness, cloud cover, twilight progression, or other broad patterns that may be less obvious when looking at separate frames.
A startrails image combines the movement of the stars over time into a single result. This can be visually impressive, but it is also useful because it provides a clear summary of the apparent motion in the sky during the capture period. Together, keograms and startrails offer a different kind of overview from both the timelapse and the individual saved images.
These derived outputs are helpful because they answer different questions. If you want to see how the whole night flowed in sequence, a timelapse is usually best. If you want a compact summary of gradual changes, a keogram may be more useful. If you want to see accumulated star motion across the night, the startrails image is the right place to look.
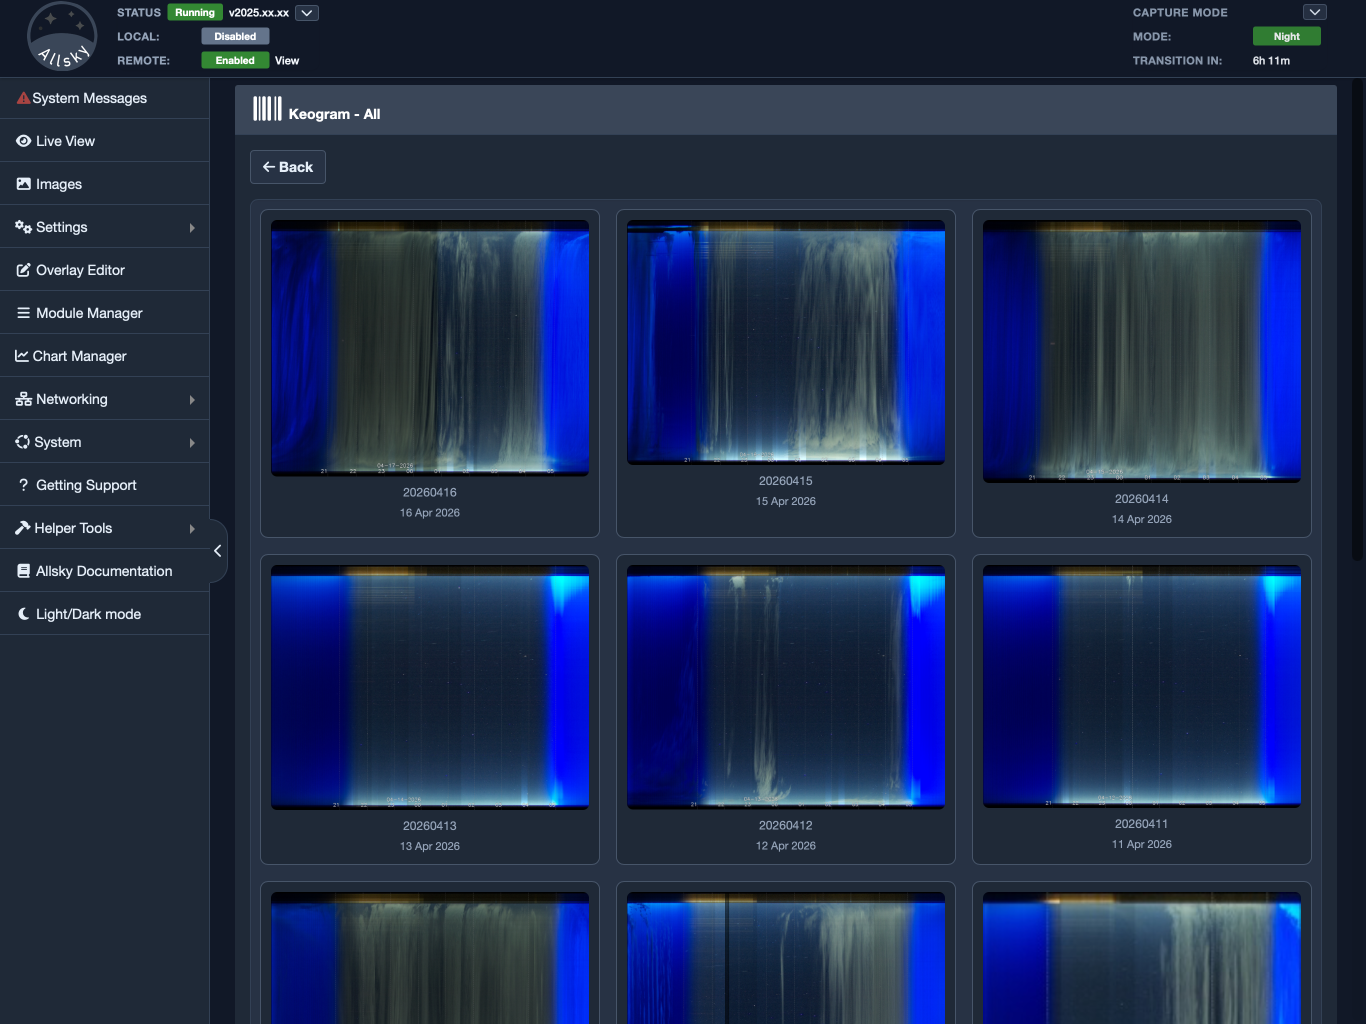
Keogram views
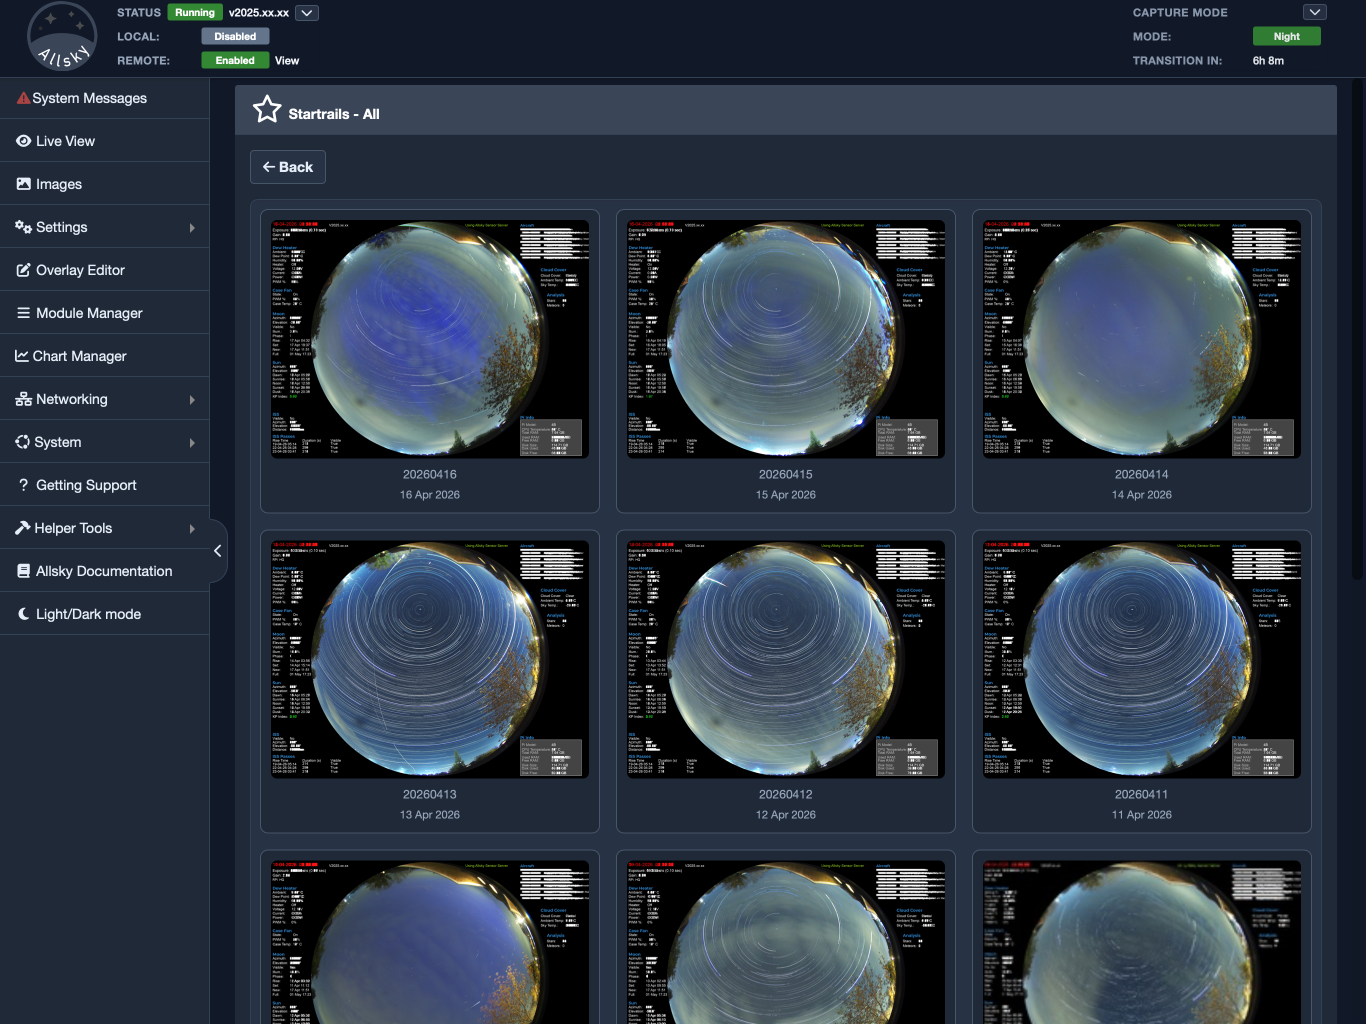
Startrails views
A common workflow is:
- start on the day list
- open the timelapse for a quick overview
- check the keogram or startrails for a different summary of the night
- return to the saved images if you want to inspect a specific frame
Keeping everything grouped by date makes that process straightforward. You do not need to think in terms of where files are stored on disk or how they were created. Instead, you simply choose a date and move between the available views until you find the level of detail you need.
The Images area also helps with storage management. Over time, saved images and generated outputs can use a meaningful amount of disk space, especially on systems that run continuously. If you no longer want to keep a day’s files, you can delete that day from the list.
This is useful when you want to remove unimportant captures, clear out bad or incomplete data, or recover storage space on the system. Managing files by day is usually the most practical approach because all of the related output for that capture period stays grouped together. In most cases, it is easier to decide whether you want to keep or remove an entire day than to manage the files one by one.
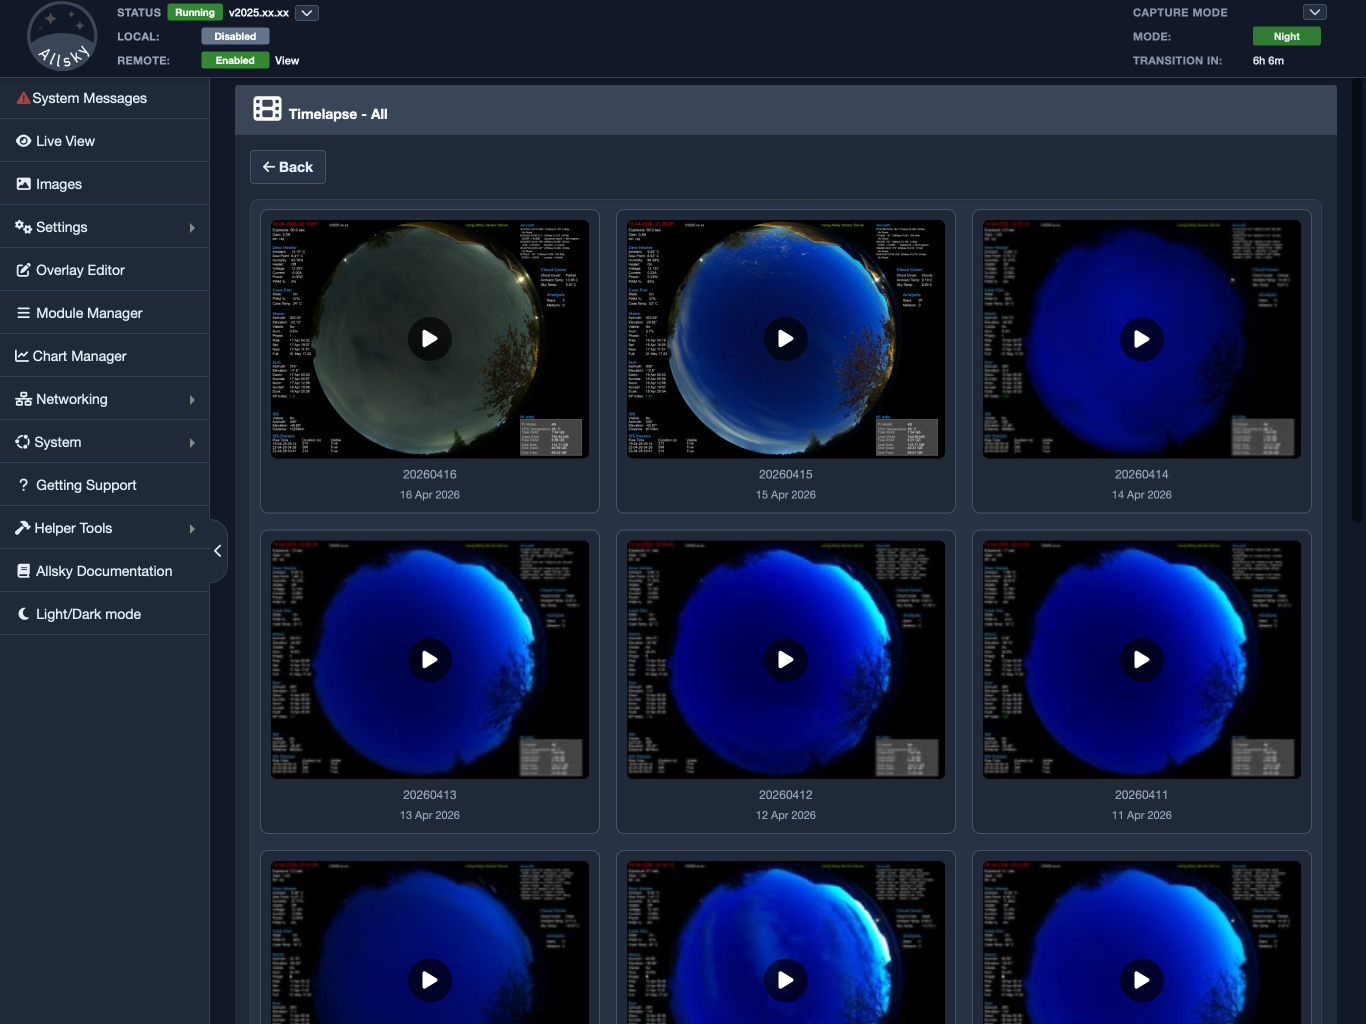
Timelapse video view
If a day does not show a timelapse, keogram, or startrails image, that usually means that output was not created or was not saved for that date. The Images area is mainly a viewer. It shows you what is available, but it does not generate missing files on demand.
If you expected something to appear and it is missing, the next step is usually to check the related Allsky settings, the save and upload behaviour for that type of output, or the processing steps that create it. In other words, a missing item here usually points to how that output was produced or stored, rather than to a problem with the Images page itself.
The Images section is one of the most useful parts of the WebUI because it brings all of your saved output together in one place and presents it in a way that is easy to browse. Whether you want a fast overview of the night, a compact summary of changing conditions, or a close look at individual frames, this is where you do it.
For day-to-day use, it is the part of the WebUI that turns Allsky’s saved output into something practical to review, compare, and manage.